 Save to Pinterest
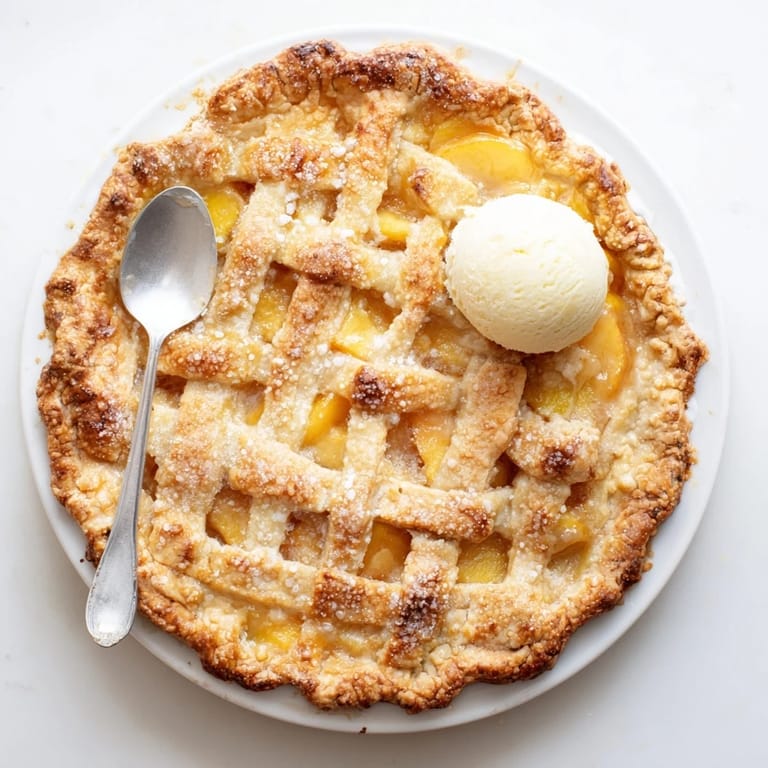
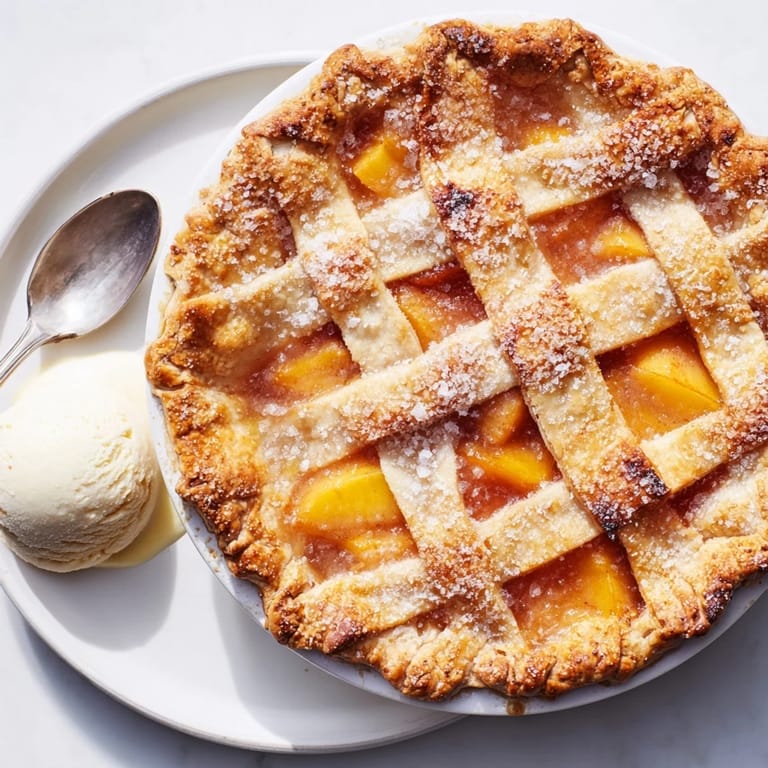
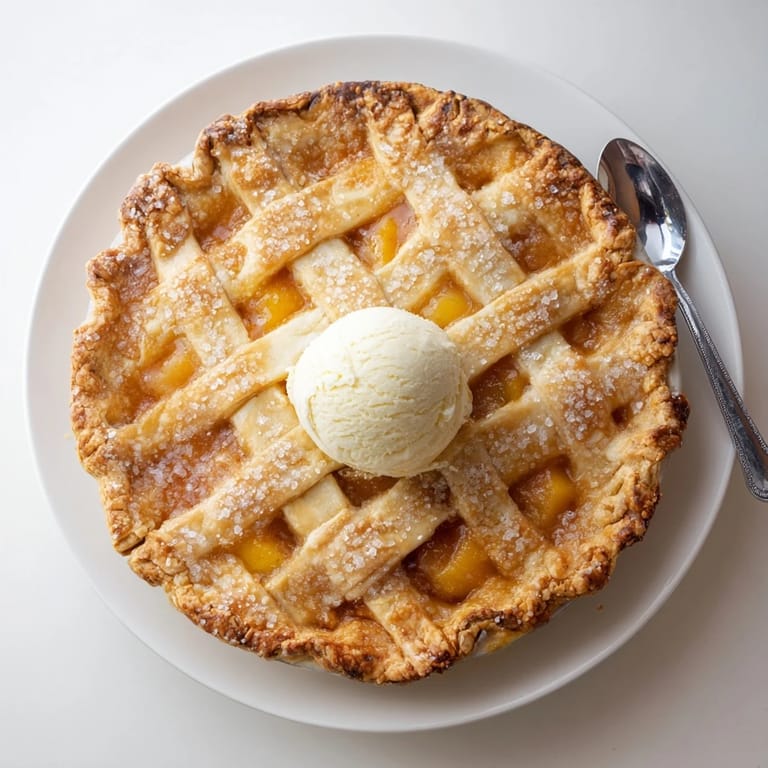
 Theres something about the way peach filling bubbles up through steam vents that makes my whole kitchen feel like summer. I made this pie once during a heatwave because the farmers market peaches were too perfect to pass up, and my husband kept opening the oven door just to inhale. The aroma of cinnamon and vanilla mingling with sweet peaches became the defining memory of that July.
Last summer my neighbor brought over a bag of peaches from her tree, more than she could handle. I spent an entire Sunday afternoon peeling and slicing, flour dusting my apron and the counter. We ate pie on her porch that evening while fireflies flickered in the yard, and she said it tasted exactly like the ones her grandmother made.
Ingredients
- All-purpose flour: Provides structure to your crust, and I learned the hard way that measuring by weight yields the most consistent results
- Cold unsalted butter: Cold butter creates those flaky layers we all love, so keep it chilled until the moment it hits the flour
- Ripe peaches: The star of the show, and a mix of yellow and white varieties gives you the best depth of flavor
- Granulated sugar: Balances the natural acidity of the peaches and helps create that gorgeous thickened filling
- Cornstarch: The secret to a pie that sets up properly instead of running all over your plate
- Lemon juice: Brightens the filling and keeps those peaches from oxidizing while you work
- Ground cinnamon and nutmeg: Warm spices that make the peach flavor sing without overwhelming it
- Vanilla extract: Rounds out all the flavors and adds that comforting bakery aroma
- Egg wash: Gives your crust that professional bakery shine and beautiful golden color
Tired of Takeout? 🥡
Get 10 meals you can make faster than delivery arrives. Seriously.
One email. No spam. Unsubscribe anytime.
Instructions
- Make the pie crust:
- Whisk flour, sugar, and salt in a large bowl, then work in cold butter with your fingers until you see pea-sized chunks throughout. Drizzle in ice water one tablespoon at a time, tossing gently until the dough holds together when squeezed. Shape into two discs, wrap tightly, and let rest in the refrigerator for at least an hour.
- Prepare the peach filling:
- Toss those beautiful sliced peaches with sugar, cornstarch, lemon juice, spices, and vanilla until every piece is coated. Let it sit for about 10 minutes while you preheat your oven to 400°F.
- Roll out the bottom crust:
- On a well floured surface, roll one dough disc into a 12-inch circle, lifting and rotating frequently to prevent sticking. Transfer it carefully to your 9-inch pie dish and trim the edges so they overhang slightly.
- Add the filling and top crust:
- Pour the peach mixture into the bottom crust and spread it evenly. Roll out the second dough disc, place it over the filling, and seal the edges by crimping with your fingers or a fork. Cut several slits in the top or weave a lattice if you are feeling fancy.
- Bake to golden perfection:
- Brush the top crust with beaten egg and sprinkle with coarse sugar for extra crunch. Bake for 50 minutes until the filling bubbles vigorously through the vents and the crust turns deep golden brown, covering the edges with foil if they brown too quickly.
- Let it set:
- Cool the pie on a wire rack for at least 2 hours before slicing. This patience test is crucial because the filling needs time to firm up, but the wait makes that first warm bite absolutely incredible.
 Save to Pinterest
 My daughter now asks for this pie on her birthday instead of cake. She sat on the kitchen counter watching me crimp the crust edges when she was six, and now she is better at lattice work than I am.
Choosing the Perfect Peaches
I have learned that peaches should give slightly to gentle pressure but still feel firm, not mushy. The ones that smell like peach heaven at the farmers market always bake up the best, and do not worry if they have a little red blush, that is just sun kissed flavor.
Making It Ahead
You can prepare the dough up to 2 days in advance and keep it wrapped tight in the refrigerator. The filling can be mixed and stored separately, but I recommend assembling the pie just before baking for the freshest results.
Serving Suggestions
Nothing beats this pie warm from the oven with vanilla ice cream slowly melting into every crevice. A dollop of lightly sweetened whipped cream works too, especially if you have fresh mint to garnish.
- Let the pie cool for at least 15 minutes before serving warm so the filling has time to set slightly
- A scoop of high quality vanilla bean ice cream is non negotiable in my house
- Fresh basil or mint leaves scattered on top add a surprising bright contrast to the sweet peaches
 Save to Pinterest
 There is something deeply satisfying about serving a homemade fruit pie, watching people close their eyes at that first bite. This peach pie has become my go to for bringing people together.
Recipe Questions & Answers
- → Should I peel the peaches?
Yes, peeling peaches is recommended for a smooth texture. The skins can become tough and chewy during baking. Simply blanch them in boiling water for 30 seconds, then transfer to ice water—the skins will slip right off.
- → Why is my filling runny?
This usually happens if the pie hasn't cooled long enough. The filling needs at least 2 hours to set as it cools. Also ensure you used enough cornstarch and didn't cut into it while still hot.
- → Can I use frozen peaches?
Frozen peaches work well when fresh aren't available. Thaw them completely and drain excess liquid before mixing with sugar and cornstarch. You may need to increase cornstarch slightly.
- → How do I prevent a soggy bottom crust?
Place your pie dish on a preheated baking sheet to help the bottom crust cook evenly. You can also brush the bottom crust with egg white before adding the filling to create a seal.
- → How should I store leftover pie?
Store covered at room temperature for up to 2 days. For longer storage, refrigerate for up to 5 days. The pie also freezes well—wrap tightly and freeze for up to 3 months.
- → What's the best way to tell when it's done?
The crust should be deep golden brown and you should see the filling bubbling actively through the vents. If the crust browns too quickly, cover edges with foil after 30 minutes.