 Save to Pinterest
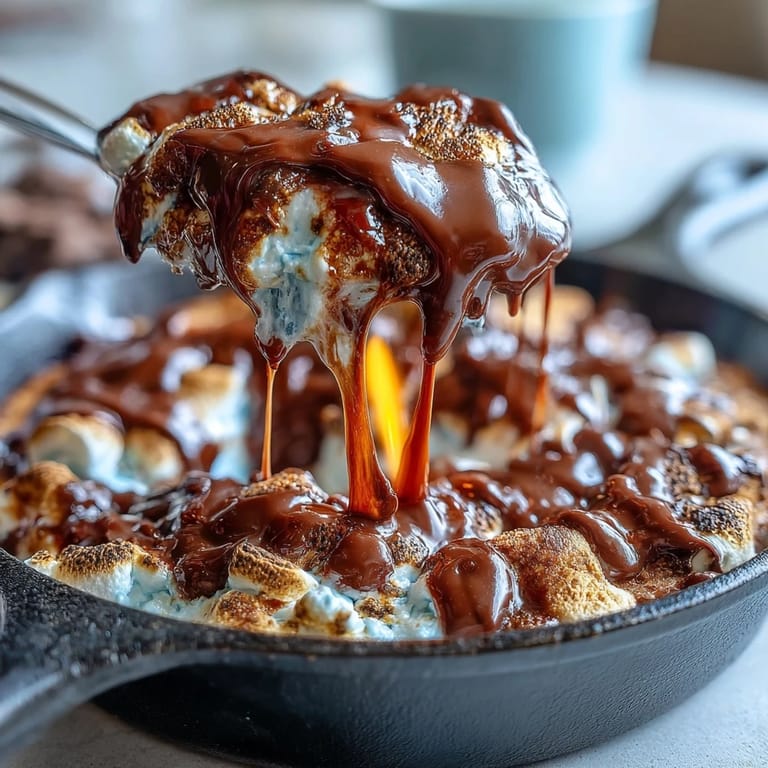
 My neighbor knocked on our back door that Fourth of July afternoon with a cast iron skillet in one hand and a bag of marshmallows in the other, grinning like she'd just solved world peace. She'd seen this s'mores dip trending online but decided to make it happen in real time for our cookout, and honestly, watching that chocolate melt and those marshmallows puff up golden in the oven felt like the most American dessert invention since the ice cream cone. Within minutes, everyone abandoned their lawn chairs and crowded around our kitchen window, pressing their faces against the glass like kids at a bakery. It became the moment that somehow turned a regular holiday gathering into something we still talk about.
There's something about watching a cast iron skillet work its magic that changes how you think about cooking for people. My cousin brought her new boyfriend to our Independence Day gathering, and while the adults were scattered around the patio, he stood by the oven watching the marshmallows toast, completely mesmerized like he was witnessing something profound. When it came out golden and bubbling, he was the first to grab a graham cracker, and I watched him experience that exact moment when warm chocolate meets toasted marshmallow and suddenly everything makes sense. That's when I knew this recipe wasn't just about dessert anymore.
Ingredients
- Semi-sweet chocolate chips (2 cups): The foundation of everything, and honestly, don't cheap out here because melted chocolate is the whole vibe—good chocolate tastes like vacation, mediocre chocolate tastes like regret.
- Unsalted butter (1 tablespoon): Just a whisper of it, but it makes the chocolate silky instead of thick, which is the difference between something you want to eat and something you have to chew.
- Large marshmallows (3 cups): Buy fresh ones if you can; old marshmallows don't toast right and they taste a little like sad memories instead of celebration.
- Graham crackers (16 broken into pieces): These are your delivery system, your edible spoon, your vehicle for the whole experience—don't forget them or you're just standing there with a warm skillet and a spoon.
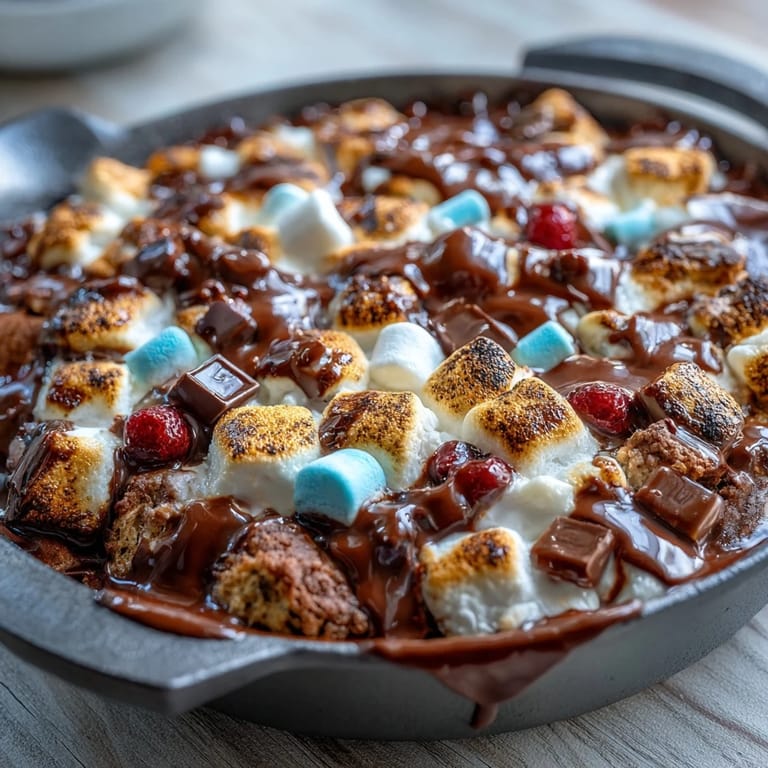
- Red, white, and blue chocolate candies (1/4 cup, optional): Totally optional but they catch the light and make people smile before they even taste anything, which is half the battle.
- Strawberries and blueberries (1 cup each, optional): Fresh berries cut through the richness and give you an excuse to feel like you made something wholesome, even though you're eating melted candy.
Tired of Takeout? 🥡
Get 10 meals you can make faster than delivery arrives. Seriously.
One email. No spam. Unsubscribe anytime.
Instructions
- Heat your oven and gather your crew:
- Preheat to 400°F and get your cast iron skillet ready—if you don't have one, borrow one, because this recipe demands it. The skillet holds heat like a memory and makes everything taste better somehow.
- Layer the chocolate foundation:
- Dump your chocolate chips and butter into the cold skillet and slide it into the oven for 3 to 4 minutes until the chocolate softens into a glossy pool. Don't walk away entirely; you want to catch it before it goes from melted to overdone, which happens faster than you'd think.
- Smooth and compose:
- Pull the skillet out carefully (it'll be hot and ready to mean business) and stir until the chocolate and butter marry into something silky and uniform. This is the moment where the recipe actually starts feeling like something real instead of ingredients in a bowl.
- Marshmallow moment:
- Arrange your marshmallows in a single layer over that chocolate like you're tucking them into bed, making sure they touch each other so they don't collapse into gaps. This is where patience matters because even coverage means even toasting, which means everyone gets that perfect golden top.
- Toast to golden perfection:
- Back into the oven for 5 to 7 minutes, watching through the window because the moment between perfectly toasted and accidentally-charred is about 30 seconds. You'll see them puff up and turn golden, and that's your sign to grab the oven mitts and get it out before it crosses the line.
- The optional garnish:
- If you're feeling festive, sprinkle those patriotic candies over the top while everything is still warm enough to make them stick. This step is pure theater and absolutely worth it if you have an audience.
- Rest and serve:
- Give it 3 to 5 minutes to settle down from its oven adventure, then surround that skillet with graham crackers and fruit like it's the center of the universe. Serve immediately because once it cools, it becomes harder to scoop and loses some of that liquid-gold appeal.
 Save to Pinterest
 That fourth of July taught me that the best desserts are the ones that make people stop talking and just exist in the moment together. We ended up sitting on the porch in the dark with that skillet between us, passing graham crackers and telling stories while the fireflies did their thing overhead, and somehow that simple dip had become the reason everyone stayed later than planned.
Cast Iron Skillet Magic
Using cast iron for this isn't just nostalgia or cooking snobbery; it's actually brilliant because the skillet holds heat so evenly that your chocolate melts gently and your marshmallows toast without any cold spots or surprises. If you don't own a cast iron skillet yet, this is a low-pressure way to see what everyone's talking about, and honestly, once you own one, you start finding reasons to use it everywhere. The bonus is that cast iron gets better with time and use, so this dip is actually helping you build a tool that'll outlive your kitchen trends.
Flavor Variations Worth Trying
The base recipe is perfect as is, but after making it a few times, you start experimenting in ways you didn't expect. A tiny pinch of sea salt over the chocolate before the marshmallows go on top transforms it into something sophisticated, and a thin drizzle of peanut butter through the melted chocolate opens up completely different flavor possibilities. Even just swapping milk chocolate for semi-sweet or adding a hint of cinnamon to the marshmallow layer reminds you that recipes are really just starting points for your own kitchen conversations.
Hosting and Timing Tips
The beauty of this dessert is that it can be your finale or your side act depending on how you time it. Make it right before people finish their main course so it's ready to go the moment they look around for dessert, or surprise them midway through the evening when energy starts to dip. The whole process takes 20 minutes from start to serve, which means you can disappear into the kitchen, do something a little bit magical, and come back out as the person who just made everyone's night better.
- Have all your dippers prepped and ready on a separate board so people can dig in the moment the skillet hits the table.
- If you're making this for a crowd, consider having a second batch in the oven rotation so there's always something warm and gooey available.
- Don't stress about perfection; slightly uneven marshmallow toasting or some chocolate showing through actually looks more homemade and honest.
 Save to Pinterest
 This recipe lives at the intersection of simple and special, which is exactly where most of life's best moments happen. Make it once, and you'll find yourself looking for excuses to gather people around your kitchen for it again.
Recipe Questions & Answers
- → What type of chocolate works best?
Semi-sweet chocolate chips provide a balanced sweetness that melts smoothly and pairs perfectly with toasted marshmallows.
- → Can I use a different pan than cast iron?
While cast iron gives even heat and rustic appeal, any oven-safe dish that withstands 400°F can be substituted, though baking times may vary slightly.
- → How do I get the marshmallows nicely toasted?
Baking the marshmallows under high heat for 5 to 7 minutes until golden brown ensures a caramelized, crunchy top while keeping the interior gooey.
- → What are good dippers for this dish?
Classic graham crackers add crunch, while fresh strawberries and blueberries provide a refreshing contrast to the rich chocolate and marshmallows.
- → Can I prepare this ahead of time?
It's best served warm immediately after baking to enjoy the melty texture; it will firm up as it cools but can be gently reheated if needed.